이번 포스트에서는 자동으로 생성된 패킷을 세션에 일일이 복사 + 붙여넣기 하는 방식을 수정하겠습니다.
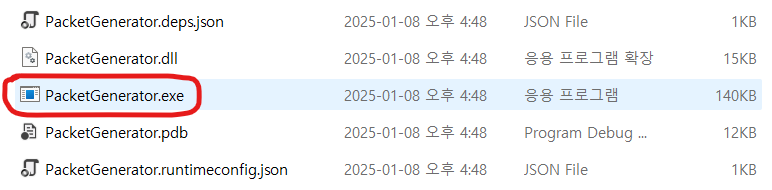
이전까지 PacketGenerator를 빌드하게 되면,
아래와 같이 실행파일이 생성 + 동작하여 패킷을 생성하였습니다.
이제 새로 bat 실행 파일을 만들어
bat 파일을 실행하면 Client와 Server의 폴더 안에 패킷을 만들어주는 작업을 수행하겠습니다.
1) PacketGenerator
.
.
.

class PacketGenerator
{
    static string genPackets;
    static ushort packetID;
    static string packetEnums;

    static void Main(string[] args)
    {
        string pdlPath = "../../PDL.xml";

        XmlReaderSettings settings = new XmlReaderSettings()
        {
            IgnoreComments = true,
            IgnoreWhitespace = true,
        };

        if(args.Length >= 1)
            pdlPath = args[0];

        using (XmlReader reader = XmlReader.Create(pdlPath, settings))
        {
            reader.MoveToContent();

            while (reader.Read())
            {
                // 파싱 중인 XML 파일의 깊이가 1이라는 것은 해당 XML 파일에 문제없이 접근한 것을 의미
                if (reader.Depth == 1)
                    ParsePacket(reader);

                // Console.WriteLine(reader.Name + " " + reader["name"]);
            }

            string FileText = string.Format(PacketFormat.fileFormat, packetEnums, genPackets);
            File.WriteAllText("GenPackets.cs", FileText);
        }
    }

	.
	.
	.
 }
일단 PacketGenerator에서 main 코드를 위와 같이 수정하여
경로를 지정해주고 해당 경로에 빌드 결과물로 GenPackets.cs를 포함한 파일들을 생성하도록 하겠습니다.
GenPackets.cs는 자동생성된 패킷을 의미합니다.
위에 작성한 경로는 PacketGenerator.cs 파일을 기준으로 작성되었으므로
자신의 프로젝트에 맞게 작성해야 합니다.
2) GeneratePacket.bat
START ../../PacketGenerator/bin/Debug/PacketGenerator.exe ../../PacketGenerator/PDL.xml
XCOPY /Y GenPackets.cs "../../DummyClient/Packet"
XCOPY /Y GenPackets.cs "../../Server/Packet"
차례대로 알아보면,
우선, PackGenerator.exe는 PacketGenarator의 빌드 결과물에 포함되어 있으므로
PacketGenarator를 먼저 빌드해야 합니다.
또 마찬가지로 경로는 GeneratePacket.bat를 기준으로 작성되었으므로
자신의 프로젝트에 맞춰 수정해야 합니다.
이어서 같이 넣어준 PDL.xml 즉 패킷의 구조를 나타낸
xml 파일을 기준으로 PacketGenerator.exe를 실행합니다.
빌드 결과로 생성된 GenPackets.cs 파일을
클라이언트의 패킷 폴더와 서버의 패킷 폴더에 복사하도록 하는 것까지 bat 파일에서 수행합니다.
bat 파일을 실행하여 확인한 최종 실행 결과는 다음과 같습니다.

문제없이 실행된 것을 확인할 수 있습니다.
'C#' 카테고리의 다른 글
| Packet Generator #6 (0) | 2025.01.20 |
|---|---|
| Packet Generator #5 (0) | 2025.01.20 |
| Packet Generator #3 (0) | 2025.01.08 |
| Packet Generator #2 (0) | 2025.01.07 |
| Packet Generator #1 (0) | 2025.01.07 |